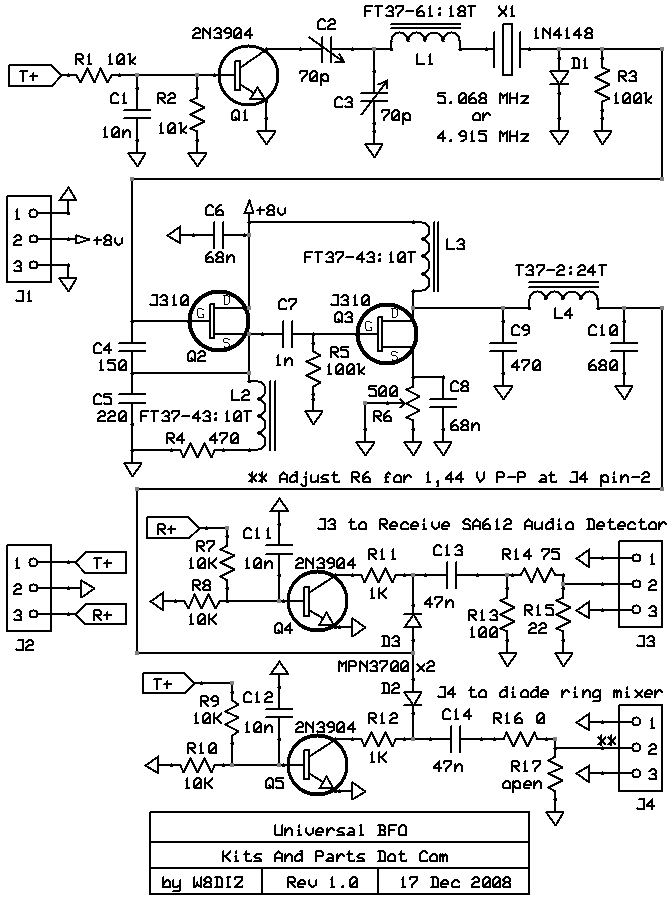
Note that this kit does NOT include the BFO crystal.
Order either the 4.91 or 5.06 Xtal
If the BFO is to be used with other RF-Toolkits, order the 5.06 Xtal
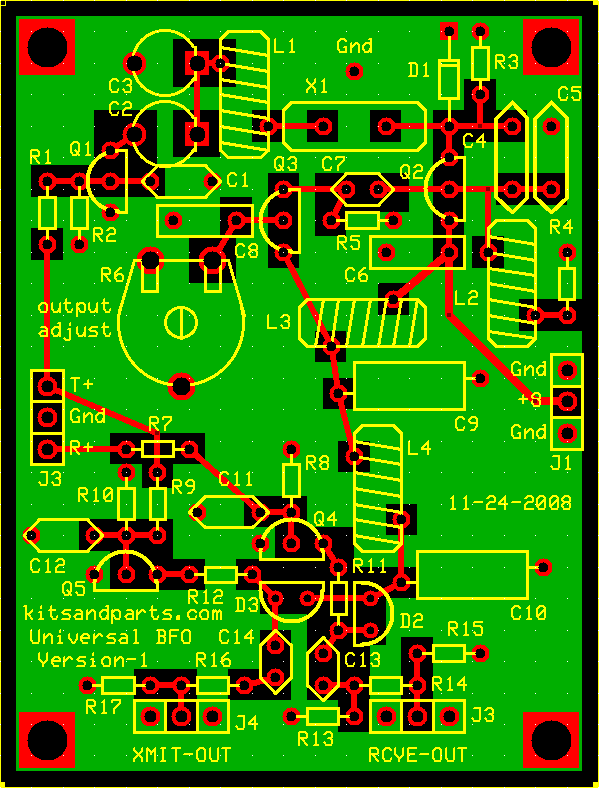
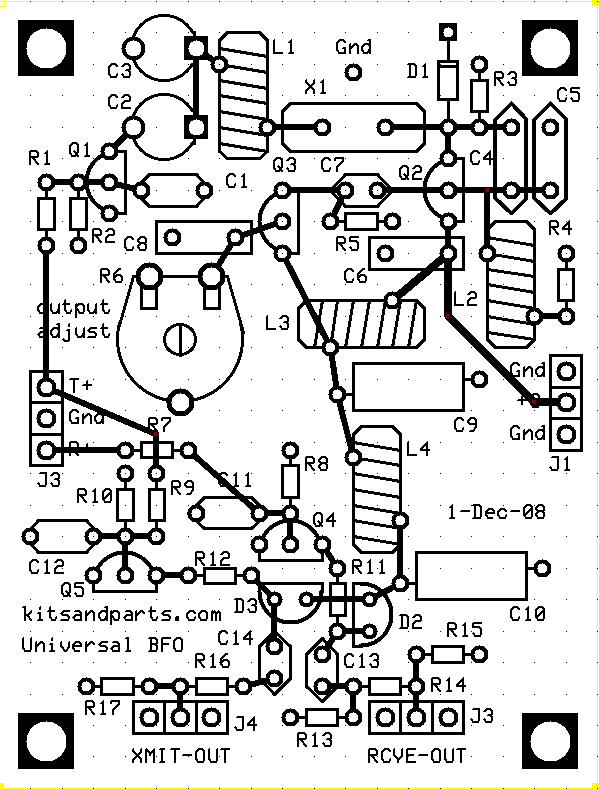
Building Instructions:
1. Inventory all Parts
note that there are two errors on the PCB
1. J3 to the left of R7 should be labeled J2 not J3.
2. the center pin of J2 should be grounded.
This can be fixed by placing a jumper from
J2 PIN-2 to the center lead of R6, the 500 ohm pot
2. Install all 1/8 Watt Resistors.
Note: Bend the resistor leads a sharp 90 degrees from the body
____R1,2,7,8,9,10: 10K Brown-Black-Orange-Gold
____R3,5: 100K Brown-Black-Yellow-Gold
____R4: 470 Yellow-Violet-Black-Gold
____R11,12: 1K Brown-Black-Red-Gold
____R13: 100 Brown-Black-Brown-Gold
____R14: 75 Violet-Green-Black-Gold
____Save a clipped lead from the next resistor to be used as a jumper wire
____R15: 22 Red-Red-Black-Gold
____R16: 0 Ohms - Use the clipped lead from R15
____R17: not required
Note that R16,17 can be used to attenuate the transmit BFO output
____R6: 500 ohm pot
Note: R6 pot controls the BFO output from 1,24 to 2,80 Volts P-P.
1,44 volts P-P equates to +7dBm or 5 Milliwatts
The transmit output is designed for 5 mWatts into a diode ring mixer
The Receive output is attenuated to 250 millivolts P-P when the transmit output is adjusted to 1,44 volts P-P
250 millivolts P-P is the suggested BFO input voltage to pin-6 of an SA612AN Gilbert Cell Mixer
3. Install all capacitors.
____C1,11,12: 10n disks labeled 103
____C2,3: 70p trimmer - note the flat polarity edge of the trimmers
____C4: 150p red disc
____C5: 220p red disc
____C6,8: 68n white box
____C7: 1n labeled 102
____C9: 470p polystyrene
____C10: 680p polystyrene
____C13,14: 47n labeled 473
4. Wind and Install all inductors.
Note that the two FT37-43 toroids are shiny black; the FT37-61 is dull gray
____L1: Wind 18 tight turns of 28 GA (12 inches) dark brown wire
through a dull gray FT37-61 toroid
Wind the wire on the toroid clockwise.
Install L1 tight against the PCB. Solder and trim leads.
____L2,3: Wind 10 turns of 26 GA (8 inches) tan-orange wire wire on each of two FT37-43 ferrite toroid.
Wind the wires on the toroids clockwise.
Install L2 and L3 tight against the PCB. Solder and trim leads
____L4: Wind 24 turns of 28 GA (15 inches) dark brown wire wire on a T37-2 red toroid.
Wind the wire on the toroid clockwise.
Install L4 tight against the PCB. Solder and trim leads
5. Install all semiconductors.
____D1: 1N4148 - note the polarity band
____D2,3: MPN3700 - note the flat edge of the PIN diode body
____Q1,4,5: 2N3904 - note the flat edge of the transistor body
____Q2,3: J310 - note the flat edge of the J-Fet body
6. Install a BFO crystal.
____X1: ordered separately.
select either the 4.91 or 5.06 Xtal
If the BFO is to be used with other RF-Toolkits, order the 5.06 Xtal
install the crystal by inserting into the PCB and tilting it 10 degrees
solder and straighten the crystal on the PCB
solder a jumper wire from the top of the crystal to the PCB labeled GND
7. Testing and alignment.
When testing the BFO, you must have +8V at PIN-1 of J2 for transmit
or +8V control voltage at PIN-3 of J2 for receive.
Connect a 50 ohm load from PIN-2 of J4 to ground.
Power up the BFO with +8V and connect +8V to PIN-1 of J2
Connect a scope to Pin-2 or J2 and adjust R6 for 1,44 volts P-P on the scope.
Now we will calibrate/adjust the BFO transmit and receive frequencies. Before you can calibrate the frequencies, you must know the center frequency of your crystal roofing filter. The BFO transmit frequency should be the same as the crytal filter and the BFO receive frequency should be 600 Herz (aka cycles) higher. Connect 50 ohm loads to the BFO outputs and use a frequency counter to measure the frequency. When in transmit mode, adjust C2 for the transmit frequency. Switch to receive mode and adjust C3 for the receive frequency, There will be interaction between C2 and C3 so you may need to repeat this several times until you have a 600 Herz difference between frequencies.
The BFO is now finished. Take a break and ponder your work of art.